Day 18 - Docker Compose for DevOps Engineers

Introduction :
Docker Compose is a tool that allows you to define and manage multi-container Docker applications using a simple YAML file.
It helps streamline the process of running complex applications by allowing you to define all the necessary services, networks, and volumes in a single configuration file.
This makes it easier to set up, deploy, and scale your applications consistently across different environments.
With Docker Compose, you can specify the various components of your application, such as databases, web servers, backend services, and more, as separate containers.
These containers can communicate with each other and work together to form a complete application stack
Docker Compose provides a unified way to orchestrate these containers, ensuring that they start, stop, and interact seamlessly.
What is docker Compose?
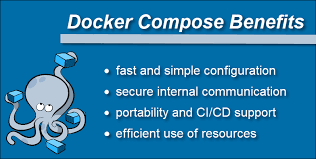
Docker Compose is an open-source tool that allows you to define and manage multi-container Docker applications.
It simplifies the process of orchestrating and running multiple Docker containers as a cohesive application stack.
Docker applications use a simple YAML file.
Here's a breakdown of Docker Compose's key features and concepts:
Declarative Configuration:
Docker Compose uses a YAML file (typically named docker-compose.yml) to define the structure of your application, including the Docker images, environment variables, ports, volumes, and dependencies for each service.
Service Definition:
Each component of your application is defined as a "service" within the Docker Compose file. A service could represent a web server, database, backend API, cache, or any other part of your application.
Networking:
Docker Compose creates a default network for your application, allowing services to communicate with each other using their service names as hostnames. You can also define custom networks to isolate and control communication between specific services.
Volumes: Docker Compose enables you to define data volumes that persist beyond the lifecycle of containers. This is essential for maintaining data integrity and stateful applications.
Scaling: You can easily scale services by specifying the desired number of replicas for each service. Docker Compose handles the distribution and load balancing of requests among the replicated containers.
Environment Variables and Secrets: Docker Compose allows you to manage environment variables and sensitive information (such as passwords) separately from your application code, enhancing security and configuration management.
Command-line Interface: Docker Compose provides a set of commands that let you manage your application stack, such as starting, stopping, building, and inspecting services.
To use Docker Compose, you create a docker-compose.yml file, specifying the services, networks, and volumes your application requires. Then, you can use the docker-compose command-line tool to manage the entire application stack's lifecycle.
What is YAML?
YAML (short for "YAML Ain't Markup Language" or sometimes "Yet Another Markup Language") is a human-readable data serialization format.
It is often used for configuration files and data exchange between languages with different data structures.
YAML's design aims to be easily readable by humans, while also being straightforward for machines to parse.
YAML files use a .yml or .yaml extension.
Key characteristics of YAML include:
Human-Readable:
YAML uses indentation and whitespace to define the structure of data, making it easy for humans to read and write. It avoids the use of complex symbols or markup characters that can make other data formats hard to decipher.
Data Serialization:
YAML can represent simple and complex data structures, including lists, dictionaries (key-value pairs), arrays, and nested structures. This makes it suitable for configuration files and data exchange between applications.
Whitespace Significance:
Unlike some other data formats, such as JSON, YAML relies on whitespace and indentation to define the hierarchy and relationships between data elements. This can lead to more intuitive and visually appealing representations.
Language Independence:
YAML is not tied to any specific programming language, making it an excellent choice for exchanging data between different systems or applications written in different languages.
Comments:
YAML allows comments to be included in the data, providing developers with the ability to add explanatory notes or reminders directly in the configuration files.
Support for Complex Data Types:
YAML can represent not only simple data types like strings and numbers but also more complex data types, such as dates, booleans, and null values.
Here's a simple example of a YAML representation of a basic configuration:
# Example YAML Configuration
server:
  name: my_server
  port: 8080
  enabled: true
database:
  host: localhost
  username: my_user
  password: my_secret_password
In this example, we have a configuration with two main sections, server and database, each containing key-value pairs representing various configuration settings.
YAML is widely used in many domains, including configuration management tools like Ansible and Kubernetes, as well as in various software projects for defining settings, configurations, and data structures in a human-readable format.
Task-1
Learn how to use the docker-compose.yml file, to set up the environment, configure the services and links between different containers, and also to use environment variables in the docker-compose.yml file.
The provided docker-compose.yml file defines a simple environment with two services: a web server using the Nginx image and a MySQL database. Let's go over the contents of this file:
Create a Directory Structure:
Start by creating a directory for your project. Inside this directory, create a docker-compose.yml.
Write the docker-compose.yml File:
 version : "3.3"
 services:
   web:
     image: nginx:latest
     ports:
       - "80:80"
   db:
     image: mysql
     ports:
       - "3306:3306"
     environment:
       - "MYSQL_ROOT_PASSWORD=test@123"
version: "3.3": Specifies the version of the Docker Compose file format being used.
services: This section defines the different services (containers) in your application.
web: This service is defined with the nginx:latest image, which pulls the latest version of the Nginx image from Docker Hub. It maps port 80 on the host machine to port 80 in the container, allowing you to access the Nginx web server.
db: This service uses the mysql image, which is the official MySQL image from Docker Hub. It maps port 3306 on the host to port 3306 in the container. Additionally, it sets the MYSQL_ROOT_PASSWORD environment variable to "test@123", which will be used as the root password for the MySQL database.
Start the Services:
Open a terminal, navigate to the project directory containing the docker-compose.yml file, and run the following command to start the services:
docker-compose up
Docker Compose will build images if needed and start the containers based on your configuration.
Access the Application:
You can access the frontend service by opening a web browser and going to http://localhost. Depending on your backend code, the front end might be configured to make requests to the backend service using its service name (backend) as the hostname.
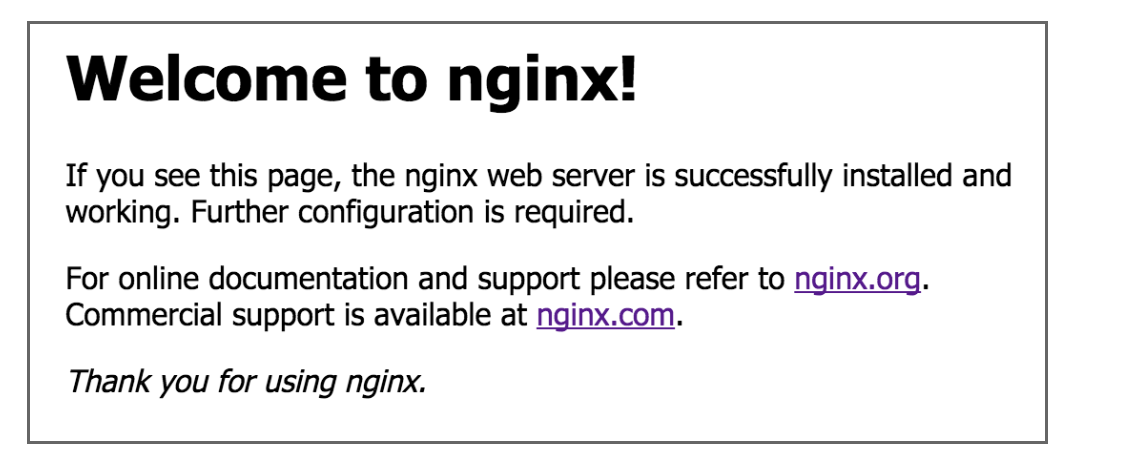
This example demonstrates how you can use Docker Compose to define and manage a multi-container application environment.
You can further customize this configuration by adding volumes, specifying network connections, and including additional services as needed.
Task-2
Pull a pre-existing Docker image from a public repository (e.g. Docker Hub) and run it on your local machine:
Open a terminal and pull an image from Docker Hub. For this example, we'll use the official httpd image (Apache HTTP Server).
docker pull httpdGive User Permission to Docker:
Add your user to the docker group to allow running Docker commands without using sudo.
sudo usermod -aG docker ubuntuReboot the Instance:
After adding your user to the docker group, reboot the system to apply the group changes
sudo rebootRun the Container as a Non-Root User:
docker run -d -p 8080:80 --name my-httpd-container httpdInspect Container:
Use the docker inspect command to inspect the container's running processes and exposed ports:
docker inspect my-httpd-containerView Container Log Output:
View the container's log output using the docker logs command:
docker logs my-httpd-container
Stop and Start the Container:
Stop the container:
docker stop my-httpd-container
Start the container:
docker start my-httpd-containerRemove the Container:
When you're done, remove the container:
docker rm my-httpd-containerThis walkthrough demonstrates pulling an image, running it as a non-root user, inspecting the container, viewing logs, stopping and starting the container, and finally removing it. You can adapt these steps for other images and scenarios.
Task - 3:
How to run Docker commands without sudo?
Add User to Docker Group:
Open a terminal and run the following command to add your user to the Docker group:
sudo usermod -aG docker ubuntuLog Out and Log In (or Reboot):
After adding your user to the docker group, you need to either log out and log back in, or you can reboot your system to apply the group changes. This step is necessary to ensure that the group changes take effect.
sudo reboot
Verify Permissions:
After logging back in or rebooting, you can verify that your user has the necessary permissions to run Docker commands without sudo by running a Docker command without sudo:
docker infoIf you see information about your Docker setup without any permission errors, it means you now can run Docker commands without using sudo.
Conclusion :
In conclusion, Docker Compose is a powerful tool for orchestrating and managing multi-container applications. It simplifies the setup, configuration, and deployment of complex environments by allowing developers to define services, networks, volumes, and other components using a human-readable YAML file.
Docker Compose streamlines the development process, enables consistent deployment across different environments, and enhances collaboration among teams. It's a valuable asset for building, testing, and scaling applications efficiently, making it an essential tool in modern DevOps workflows.
I hope you find the blog post helpful! If you do, don't forget to like 👍, comment 💬, and share 📢 it with your friends and colleagues.