Day 17 - Docker Project for DevOps Engineers
Introduction to DockerFile :
A Dockerfile is a plain text configuration file used in the Docker containerization platform.
It is used to define the steps and instructions necessary to create a Docker container image.
Docker containers allow you to package an application along with its dependencies and runtime environment into a single lightweight, isolated unit that can run consistently across different environments.
A Dockerfile typically includes a series of instructions that are executed to build the container image. These instructions can include:
Base Image: Specifying a base image that forms the starting point for the container image. This base image provides a minimal operating system with specific libraries or tools.
Copying Files: Adding files, directories, and application code into the container image.
Running Commands: Executing commands within the container image to install software, set up configurations, and perform other tasks.
Setting Environment Variables: Defining environment variables that the application inside the container can use.
Exposing Ports: Specifying which network ports should be exposed by the container for communication with the outside world.
Running Processes: Specifying the command that should be executed when the container is started.
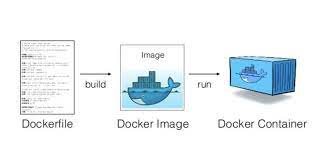
Once you have created a Dockerfile, you can use the docker build command to build an image from it.
This image can then be used to run containers that contain your application and its dependencies, isolated from the host system and other containers.
Dockerfiles are a key component of Docker's declarative and reproducible approach to managing software deployments.
Task :
Create a Dockerfile for a simple web application (e.g. a Node.js or Python app)
Here, app.js is the file where the developer has written code & the file is located in the same directory as Dockerfile.
  vi app.js
  ------------------------------------------------------------------
  const http = require('http');

  const hostname = '0.0.0.0';
  const port = 80;

  const server = http.createServer((req, res) => {
      res.statusCode = 200;
        res.setHeader('Content-Type', 'text/plain');
          res.end('Hello NodeJS from Docker\n');
  });

  server.listen(port, hostname, () => {
      console.log('Server running at http://%s:%s/', hostname, port);
  });

  process.on('SIGINT', function() {
      console.log('Caught interrupt signal and will exit');
      process.exit();
  });
Build the image using the Dockerfile and run the container
To build an image from this Dockerfile, save it as "Dockerfile" in your application's root directory, and then run the following command in the same directory:
  #Base image / Parent image for running node js application
  FROM node:6

  #working directory for container when launched
  WORKDIR /app

  #copy content from our current directory (app.js & Dockerfile) & place inside app/
  COPY . /app

  #Exposing container port to 8000
  EXPOSE 8000

  #To run node application
  CMD ["node","app.js"]
docker build -t my-node-app .Here, my-node-app is the name you're giving to the image, and . indicates that the build context is the current directory.
Once the image is built, you can run a container from it:
docker run -d -p 8000:8000 my-node-appVerify that the application is working as expected by accessing it in a web browser
Open a web browser and navigate to http://<public_ip>:8000. If your Node.js application is working as expected, you should see the output of your application in the browser.
Push the image to a public or private repository (e.g. Docker Hub )
To push the Docker image to a public or private repository, you can follow these steps, to know how to push the image to Docker Hub:
Create an Account on Docker Hub:
If you don't have a Docker Hub account, go to Docker Hub and create one.
Tag the Image:
Before pushing the image, you need to tag it with the repository's URL and a version tag.
Replace **<docker-hub-username>**with your Docker Hub username and my-node-app with the name you used for the image:
docker tag my-node-app <docker-hub-username>/my-node-app:v1Log in to Docker Hub:
In your terminal, log in to your Docker Hub account using the docker login command:
docker loginYou will be prompted to enter your Docker Hub username and password.
Push the Image:
Once logged in, you can push the tagged image to Docker Hub:
docker push <docker-hub-username>/my-node-app:v1Docker will upload the image to your Docker Hub repository. Replace <docker-hub-username> with your Docker Hub username.
Access the Image:
Your pushed image will now be available on Docker Hub. You can see it by visiting your Docker Hub profile in a web browser and navigating to the "Repositories" tab.
Conclusion:
Remember that this Dockerfile serves as a starting point, and you may need to customize it further based on your application's specific requirements, such as additional environment variables, database connections, or other dependencies.
To summarize, the Dockerfile provides a foundation for containerizing a Node.js blog application.
I hope you find the blog post helpful! If you do, don't forget to like 👍, comment 💬, and share 📢 it with your friends and colleagues.